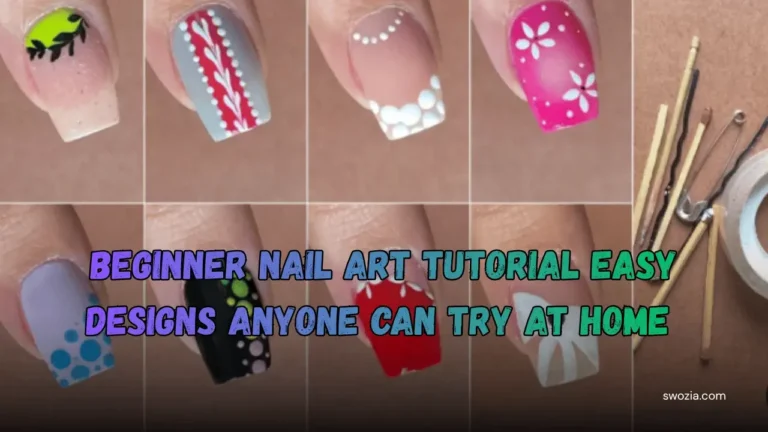
3D Nail Art Tutorial: Rhinestones, Charms & Sculpted Designs will teach you how to create stunning, professional-looking nails from home. Perfect for DIY nail enthusiasts in the USA, ages 18–35, this step-by-step guide covers sculpted designs, sparkling rhinestones, and charming accents. Whether you’re a beginner or experienced in nail art, this tutorial will help you achieve glamorous, long-lasting 3D nail designs.
What is 3D Nail Art?

In this 3D Nail Art Tutorial: Rhinestones, Charms & Sculpted Designs, you’ll learn how 3D techniques differ from regular nail designs. 3D nail art adds dimension using sculpted shapes, rhinestones, and charms to create bold, eye-catching designs.
The Evolution of 3D Nail Art
- 3D nail art has grown from simple embellishments to intricate, sculpted designs using acrylics, gels, and other materials.
- Popularized on social media, 3D designs allow for endless creativity, from floral patterns to glamorous rhinestone arrangements.
Why Rhinestones, Charms & Sculpted Designs Are Trending
- Adds personality and uniqueness to nails.
- Perfect for special occasions, social media photos, or expressing individual style.
- Makes even simple nail shapes look luxurious and professional.
Tip: Always seal your 3D designs with a top coat to ensure durability and prevent decorations from falling off.
Tools & Materials Needed

To complete this 3D Nail Art Tutorial: Rhinestones, Charms & Sculpted Designs, you’ll need essential tools like fine brushes, tweezers, a UV/LED lamp, acrylic gels, and decorative rhinestones or charms.
Essential Tools
- Nail Brushes: Fine detail brushes for sculpting designs and applying gels or acrylics.
- Tweezers or Pick-Up Tools: For placing rhinestones, charms, and small decorations precisely.
- UV/LED Lamp: Needed for curing gel-based designs and ensuring longevity.
- Dotting Tools: Perfect for creating small 3D shapes, dots, and patterns.
Materials You’ll Need
- Rhinestones & Gems: For sparkling, eye-catching accents.
- Charms & Nail Decorations: Mini charms, studs, and decals to add unique personality.
- Acrylic or Builder Gels: To sculpt raised designs and durable 3D patterns.
- Base Coat & Top Coat: Protects your nails and seals your 3D designs for long-lasting wear.
Optional Supplies for Extra Creativity
- Nail glitters, foils, or powders to enhance the 3D effect.
- Small molds for shaping consistent 3D designs.
- Nail glue for extra-secure placement of rhinestones and charms.
Pro Tip: Always organize your tools before starting your 3D nail art session this keeps your workflow smooth and prevents mistakes while handling tiny decorations.
Step-by-Step 3D Nail Art Tutorial

Follow this 3D Nail Art Tutorial: Rhinestones, Charms & Sculpted Designs step by step: prepare your nails, sculpt designs, add rhinestones and charms, and seal with a top coat for long-lasting results.
1. Prepare Your Nails
- Clean & Shape: Remove old polish, trim nails, and file to your desired shape.
- Buff & Cleanse: Gently buff the surface to ensure the base coat adheres properly.
- Apply Base Coat: Protects nails and provides a smooth canvas for your 3D designs.
2. Apply Sculpted Designs
- Use Acrylic or Builder Gel: Sculpt your 3D designs directly onto the nail using fine brushes or molds.
- Popular Sculpted Ideas: Flowers, bows, geometric shapes, or themed designs.
- Cure Each Layer: Use a UV/LED lamp to harden gel designs for durability.
3. Add Rhinestones & Charms
- Placement: Use tweezers or a pick-up tool to place rhinestones, gems, or charms.
- Adhesive: Apply a small amount of nail glue or gel to secure decorations.
- Design Tips: Combine sizes, shapes, and colors for a balanced, eye-catching look.
4. Seal & Finish
- Top Coat: Apply over the entire nail to lock in your design and add shine.
- Cure Again: Use UV/LED lamp to set the top coat fully.
- Clean Edges: Remove excess gel around the cuticles with a small brush or cleanser.
5. DIY vs. Professional Tips
- DIY: Stick to smaller 3D elements if you’re a beginner to avoid overloading the nail.
- Professional: Visit a salon for intricate or heavily sculpted designs, especially for events.
Pro Tip: Avoid excessive handwashing or harsh chemicals immediately after completing your 3D nail art to ensure it lasts longer.
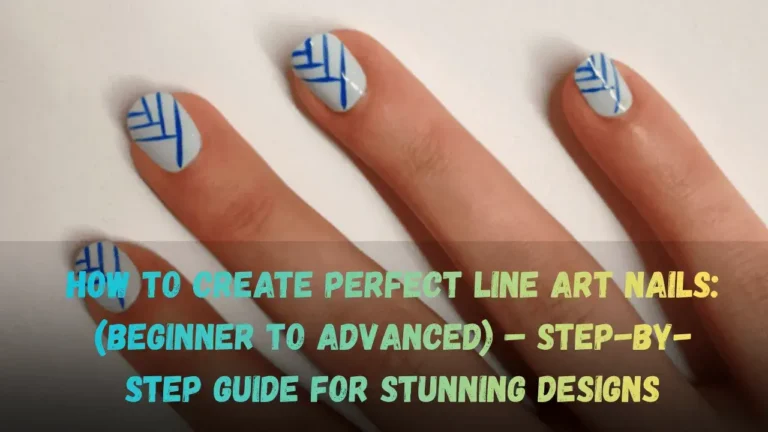
Creative Ideas & Inspiration

Get inspired with trending looks for your 3D Nail Art Tutorial: Rhinestones, Charms & Sculpted Designs, including floral sculpted designs, geometric patterns, and seasonal or holiday-themed nails.
Trendy 3D Designs
- Floral 3D Nails: Sculpted flowers paired with small rhinestones for a delicate, feminine look.
- Geometric Patterns: Use 3D shapes and lines for a modern, edgy style.
- Holiday & Seasonal Themes: Snowflakes, hearts, or pumpkins depending on the season.
Rhinestone & Charm Combinations
- Mix small and large rhinestones to create depth and sparkle.
- Add charms like tiny bows, stars, or pearls for a playful touch.
- Create accent nails with heavy 3D designs while keeping other nails simple for balance.
Minimalist 3D Nail Ideas
- Single rhinestone on each nail for a chic, understated effect.
- Small sculpted elements like tiny hearts or bows for subtle elegance.
- Neutral or pastel colors as a base to make 3D designs pop.
Social Media Inspiration
- Check Pinterest, Instagram, and nail art blogs for trending 3D designs.
- Create your own unique combination of rhinestones, charms, and sculpted elements.
- Use hashtags like #3DNailArt or #RhinestoneNails to share and discover ideas.
Pro Tip: Experiment with one nail at a time before committing to a full set this helps you perfect your technique and discover unique style combinations.
Common Mistakes & How to Avoid Them

Avoid common mistakes in your 3D Nail Art Tutorial: Rhinestones, Charms & Sculpted Designs by prepping nails properly, balancing 3D elements, and curing gels correctly for durability.
1. Overloading Your Nails
- Mistake: Adding too many rhinestones, charms, or sculpted elements can make nails look cluttered.
- Solution: Balance 3D designs with simpler nails. Use one or two accent nails for heavier designs.
Skipping Proper Nail Prep
- Mistake: Not cleaning, buffing, or applying a base coat properly.
- Solution: Always prep nails by cleaning, shaping, and applying a base coat. This ensures better adhesion and longer-lasting results.
Improper Adhesive or Gel Use
- Mistake: Using too little or too much glue, causing decorations to fall off or look messy.
- Solution: Apply small, precise amounts of adhesive and cure gels properly using a UV/LED lamp.
Ignoring Curing & Sealing Steps
- Mistake: Skipping the top coat or under-curing gels.
- Solution: Seal your 3D designs with a high-quality top coat and cure according to instructions to prevent chipping or lifting.
Rushing the Process
- Mistake: Trying to finish nails too quickly leads to smudges, uneven designs, or broken decorations.
- Solution: Take your time with each step. Patience is key to professional-looking 3D nails.
Pro Tip: Practice on a single nail or nail wheel before attempting a full set this helps you perfect placement and technique without wasting materials.
Conclusion
Creating stunning 3D Nail Art: Rhinestones, Charms & Sculpted Designs is easier than you might think with the right tools, materials, and techniques. From prepping your nails to sculpting designs and adding sparkling rhinestones or charms, this step-by-step guide has everything you need to achieve professional-looking, Instagram-worthy nails at home.
Remember, practice makes perfect start with simple designs and gradually experiment with more intricate 3D patterns. Whether you’re a beginner or an experienced DIY nail enthusiast, these tips and tricks will help your nails shine with creativity and style.
For more Nail Art Design Ideas, Please visit Swozia.com.
FAQs
1: What is 3D nail art and how is it different from regular nail designs?
3D nail art adds dimension and texture to nails using sculpted shapes, rhinestones, charms, or other decorations. Unlike flat polish designs, 3D elements “pop” off the nail for a bold, eye-catching look.
2: Can beginners do 3D nail art at home?
Yes! Beginners can start with small rhinestones or simple sculpted designs using acrylic or gel. Following step-by-step tutorials and practicing on one nail first can make the process easier.
3: How do I make my 3D nail art last longer?
Proper nail prep, using quality adhesives, curing gels correctly under a UV/LED lamp, and sealing with a top coat are key to durability. Avoid harsh chemicals or excessive handwashing right after application.
4: Are rhinestones and charms safe for nails?
Yes, when applied correctly with nail glue or gel and sealed with a top coat, rhinestones and charms are safe. Avoid placing too many heavy decorations on weak nails to prevent damage.
5: Where can I find inspiration for 3D nail designs?
Social media platforms like Instagram and Pinterest are excellent sources. Search hashtags like #3DNailArt or #RhinestoneNails to explore trending designs and create your own unique style.